
创建VideoCard组件
创建VideoCard组件
开放Beta测试文档 作为预发布开放Beta测试的一项内容,亚马逊提供了此技术文档。随着亚马逊收到反馈并对功能进行迭代,所描述的这些功能可能会发生变化。有关最新功能的信息,请参阅最新的发布说明。
定义VideoCard组件
现在有了基本的Header组件,我们需要开始创建VideoCard组件。
- 转到
components文件夹并创建一个名为VideoCard.tsx d.tsx的文件。
我们现在应该有两个文件:
src/
├── components/
│   ├── Header.tsx
│   └── VideoCard.tsx
└── App.tsx
- 从“react”导入React,从“react-native”导入StyleSheet、Text、View和Image。需要这些组件来呈现视频的标题、描述和图像。
- 创建名为VideoCard的箭头函数。
- 返回一个包含Image组件的View和另一个包含2个Text组件(标题和描述)的View。目前,将Text值硬编码为“标题”和“描述”,将Image源硬编码为https://le1.cdn01.net/videos/0000169/0169322/thumbs/0169322__002f.jpg。
- 导出VideoCard,以便其他组件和屏幕可以使用它。
VideoCard.tsx中的代码应该如下所示:
import * as React from 'react';
import {StyleSheet, Text, View, Image} from 'react-native';

const VideoCard = () => {
  return (
    <View>
      <Image
        source={ {
          uri: 'https://le1.cdn01.net/videos/0000169/0169322/thumbs/0169322__002f.jpg',
        }}
      />
      <View>
        <Text>Title</Text>
        <Text>Description</Text>
      </View>
    </View>
  );
};

export default VideoCard;
添加样式
接下来,我们需要创建一个新的StyleSheet来对VideoCard中的组件设置样式。
- 在VideoCard组件之后添加下面的StyleSheet。
const styles = StyleSheet.create({
  videoCardContainer: {
    height: 400,
    width: 550,
    borderWidth: 1,
    borderColor: 'white',
    borderRadius: 5,
  },
  videoTextContainer: {
    height: '25%',
    display: 'flex',
    justifyContent: 'space-around',
    padding: 10,
  },
  videoImage: {
    height: '75%',
  },
  videoTitle: {
    fontSize: 20,
    fontWeight: 'bold',
    color: 'white',
  },
  videoDescription: {
    color: 'white',
  },
});
我们使用borderRadius来环绕容器的边缘。我们还将justifyContent设置为'space-around',以便在标题和描述周围自动留出一些间距。要了解有关justifyContent不同选项的更多信息,请访问flexbox文档(仅提供英文版)。
- 将新样式添加到各自的组件中。
<View style={styles.videoCardContainer}>
  <Image
    style={styles.videoImage}
    source={{
      uri: 'https://le1.cdn01.net/videos/0000169/0169322/thumbs/0169322__002f.jpg',
    }}
  />
  <View style={styles.videoTextContainer}>
    <Text style={styles.videoTitle}>Title</Text>
    <Text style={styles.videoDescription}>Description</Text>
  </View>
</View>
VideoCard.tsx文件应该如下所示:
import * as React from 'react';
import {StyleSheet, Text, View, Image} from 'react-native';

const VideoCard = () => {
  return (
    <View style={styles.videoCardContainer}>
      <Image
        style={styles.videoImage}
        source={{
          uri: 'https://le1.cdn01.net/videos/0000169/0169322/thumbs/0169322__002f.jpg',
        }}
      />
      <View style={styles.videoTextContainer}>
        <Text style={styles.videoTitle}>Title</Text>
        <Text style={styles.videoDescription}>Description</Text>
      </View>
    </View>
  );
};

const styles = StyleSheet.create({
  videoCardContainer: {
    height: 400,
    width: 550,
    borderWidth: 1,
    borderColor: 'white',
    borderRadius: 5,
  },
  videoTextContainer: {
    height: '25%',
    display: 'flex',
    justifyContent: 'space-around',
    padding: 10,
  },
  videoImage: {
    height: '75%',
  },
  videoTitle: {
    fontSize: 20,
    fontWeight: 'bold',
    color: 'white',
  },
  videoDescription: {
    color: 'white',
  },
});

export default VideoCard;
呈现VideoCard组件
现在,让我们继续使用我们的App.tsx来呈现我们的VideoCard。
- 将VideoCard导入您的
App.tsx文件中。
import VideoCard from './components/VideoCard'
- 在应用的返回语句中,将VideoCard组件添加到Header组件之后。
- 由于JSX需要父元素,因此用空片段包装Header和VideoCard。
export const App = () => {
  return (
    <>
      <Header />
      <VideoCard />
    </>
  );
};
现在我们的App.tsx应该如下所示:
import * as React from 'react';
import Header from './components/Header';
import VideoCard from './components/VideoCard';

export const App = () => {
  return (
    <>
      <Header />
      <VideoCard />
    </>
  );
};
我们的视频卡就创建好了!
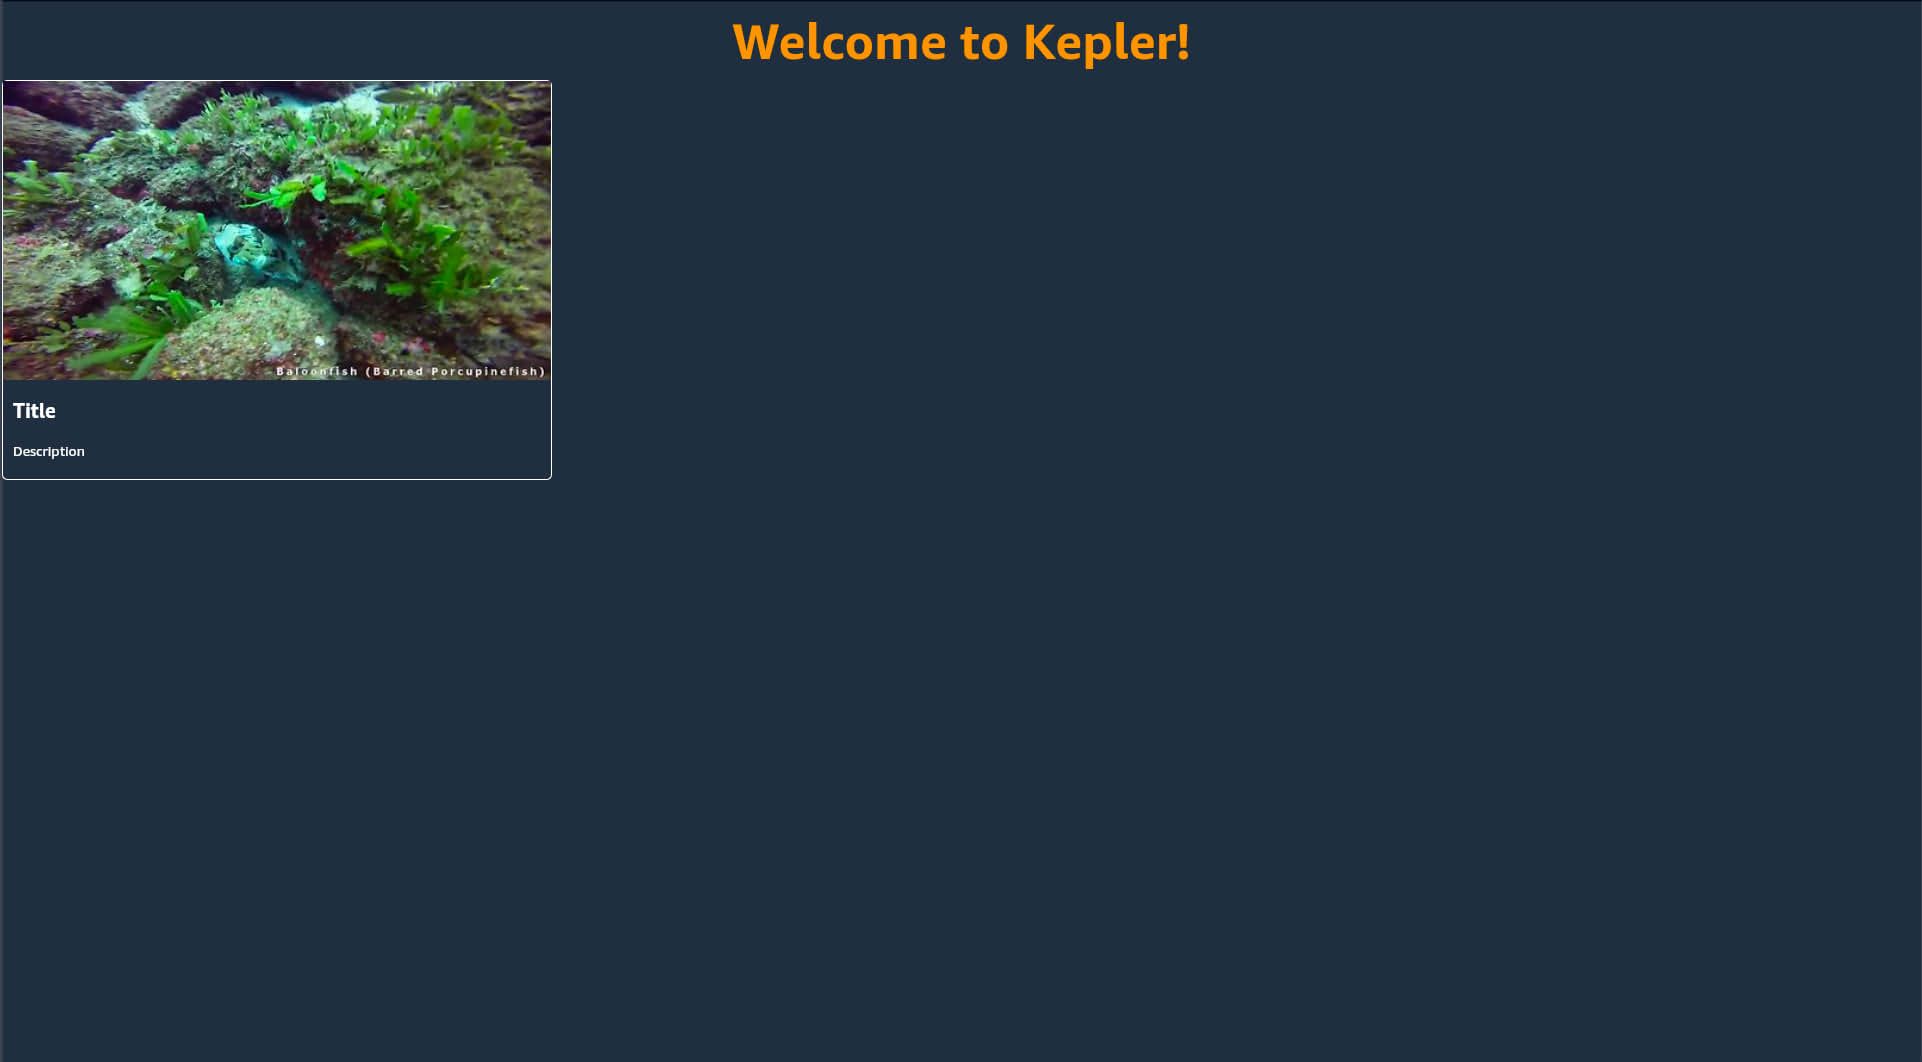
请注意,如果未如上显示,请检查您的Metro控制台是否发生错误。
- 如果你使用的是VegaStudio,请查看Output(输出)窗口
- 如果您使用的是CLI,请检查运行Metro服务器的终端
Last updated: 2026年2月9日